NavList:
A Community Devoted to the Preservation and Practice of Celestial Navigation and Other Methods of Traditional Wayfinding
From: Sean Johnston
Date: 2019 Dec 17, 19:54 -0800
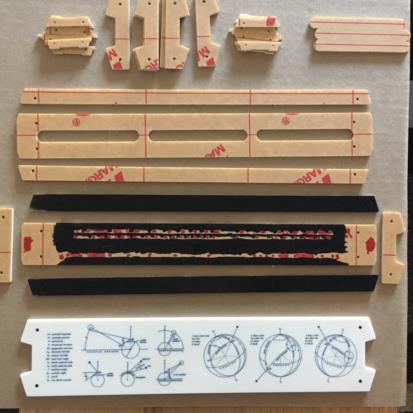
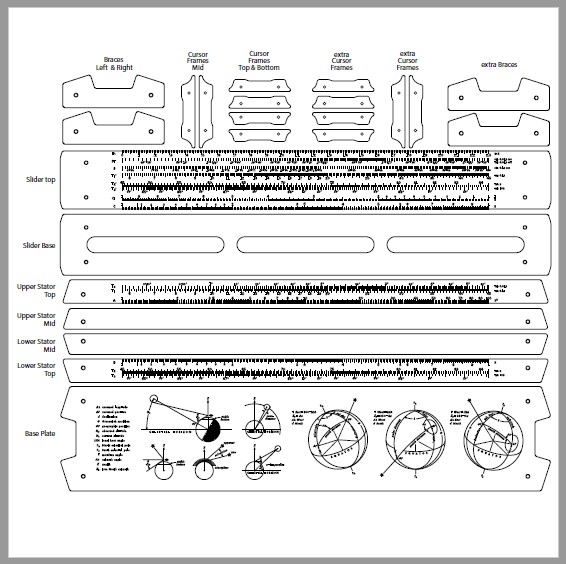
About the attached files… These .eps files [EDIT from FER: the eps files are in the attached zip] were designed to be cut/engraved at https://make.ponoko.com through their automated system. There are some extra parts included in case you have any trouble (I did).
The .pdf file has some part descriptions.
Feel free to modify as needed (like adding your name, vessel, logo, etc.). Blue lines mean cut, Red lines mean engrave. Once you go to Ponoko and upload Nav SR parts.eps, you will have a choice of materials. I used Cream colored acrylic because it seemed to be the most opaque of the plastics with 3mm thickness. I tested the white acrylic, however the more translucent materials tend to scatter the light around the fine markings and make readability worse. I also tested some of the 2 color acrylic (where the top layer is burned away). The markings looked good, but durability was a problem since the top layer was too easily scratched.
After selecting a material, Ponoko gives you a price and you can add it to your cart. Next you’ll want to upload Nav SR cursors.eps and select a transparent material. I used clear acrylic with 3mm thickness. Add it to your cart and you’re good to go. They charge by laser time and since these are pretty detailed parts, they can get expensive. Ponoko has sales pretty often though, so check back later if you don’t like the price.
Supplies:
Nuts n bolts. The holes in the parts are sized for M2 and M3 sized screws. If you use 3mm thick materials, then you’ll probably want 12mm length screws. 3mm set screws are used to keep the slider parts together - again, with 3mm thick materials, I used 5.4mm lengths. I ordered a couple sets from Amazon with all the sizes I needed.
Paint. I used black and red spray paint from the hardware store that is supposed to bind well to plastics. Use any colors you like.
Small paintbrush.
Sandpaper. A few different grades - I used 250, 500 and 1200.
2 & 3mm drill bits
Optional: 5 & 6mm (or 3/16 & 1/4) drill bits
Some type of lubricant - I used Superlube grease.
MEK(Methyl Ethyl Ketone) & syringe
Assembly:
Once you get your parts back from Ponoko the fun begins :)
Everything will be held together with a layer of masking tape - you can remove this. Each part will have a sticky paper tape layer on both sides. Do not remove this layer!
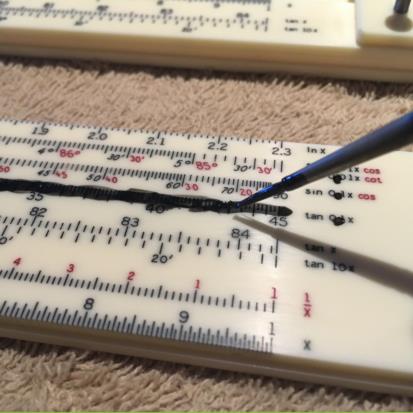
The back of the base and the 2 stator parts are all one color, so I sprayed black paint extra thick onto the engraved surface(with the paper still attached) and worked it into all the fine details with a small paint brush. I wanted 2 colors for the slider, so I sprayed some red paint into a cup and used the small brush to paint those details, then did the same for the rest of the black areas. As for the line on the clear cursor parts, I painted some black and some red - I think I like the red best. Once the paint dries, you can remove the protective paper and use fingernails or a credit card to knock off the tiny bits left from the insides of “a’s” and “o’s”. Be careful not to gouge the surface here.
The next step is to use some fine sandpaper to knock down the ridges of paint. I used 1200 grit face up on a flat surface and wet sanded until the details were crisp and clear. It doesn’t take much - don’t over do it. If you missed any spots, now’s the time to touch up with a paintbrush and repeat the wet sanding. This is the beauty of etching! You’ll have a perfectly smooth surface with fine details.
All of the parts are a fraction of a mm oversized to compensate for the laser kerf(.2mm) and the micro serrated edges left behind after cutting(from the laser pulses I guess). This means the parts should fit together pretty tightly and will need to be adjusted/sanded to get smooth sliding action. The screw holes will be tight also. I used drill bits to carefully open up the holes by spinning them with my fingers until the screws would just fit and still be tight. This is important to keep everything in alignment.
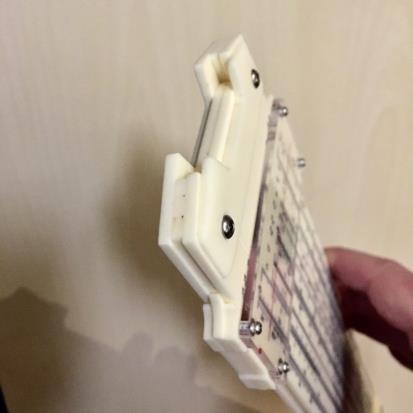
Refer to the images and the .pdf file to see how the layers of the main body stators, base plate, and the cursor frames are assembled.
Optional - counter sink the holes at the top of the braces, the bottom of the base plate, and bottom cursor frames with the larger drill bits.I also did a little shaping to the braces at this point with some sandpaper. Use set screws to assemble the 2 parts of the slider, making sure nothing is protruding(don’t want it scraping anything). Once everything is screwed together, test fit the slider and stator. Don’t sand the edges to fit yet.
At this point, you can decide whether you want to bond the parts together permanently or leave them screwed only. I bonded the main body stators to the base plate and the two slider parts, but left the cursor and brace parts screwed only. If you want to bond, make sure everything is aligned properly, then use a syringe to “weld” the parts together with MEK or similar acrylic bonding solvent.
Now some assembled parts will need to be sanded on their edges to fit and slide smoothly. If you bonded, it may be a tighter fit than before. The tightness of the screws in the braces will have some influence as well. This may take some time, so don’t get in a hurry or you may remove too much material. Finishing with the 1200 grit will provide a nice semi-polished surface. TIP: the swarf (leftover acrylic) makes great mini sanding blocks. I opted for a slightly loose dry fit and then added some grease to dampen and smooth out the action.
I’m curious to see if anyone decides to try different materials or colors. Please post results.
- Sean
I don’t know how many images can be shown on one post, so I’m hoping everyone will find the previously posted pics in this thread or the moderator will combine them here for convenience.
[EDIT from FER: Here's a link to the prior post with those images:
https://NavList.net/m2.aspx/Bob-Goethes-Mark-2-Navigators-slide-rule-test-drive-Johnston-dec-2019-g46416 ]
