NavList:
A Community Devoted to the Preservation and Practice of Celestial Navigation and Other Methods of Traditional Wayfinding


From: Frank Reed
Date: 2026 Apr 9, 12:53 -0700
Josh Carty,
Regarding David Pike's two-star fix puzzle, you wrote:
"With the inputs you gave, my next step should be to get a crude estimated position from the altitudes as given. Then I can use that as an "AP". Then from there it's just another NO-FRILLS two-star fix. No tricky math. No spherical trigonometry (at least not directly)."
Yes, that's right. So how do you get a crude AP with no time or date info?
You can draw the standard circles of position on a ball, either "real" (a toy from your local discount store) or virtual. Since a virtual ball (globe) is available to all of us in multiple forms, I have decided to go in that direction [I did, originally, draw this on a toy ball... :) ]
You need one new skill: how do you draw a standard circle of position on a virtual globe? There are ways to do this in Google Earth. Find the lat and lon of the subStar point: the latitude is just the star's Dec and the longitude (always West) is the star's GHA. We don't know the date or time, so you can pick an arbitary offset, some GHAx for convenience. Then for each star GHA* = SHA + GHAx (and in this case, GHAx has a simple interpretation as an arbitrary value of GHA Aries). A clearly easy choice sets GHAx to zero. But for the visualization, another choice may be better, and it's really completely arbitrary so indulge yourself.
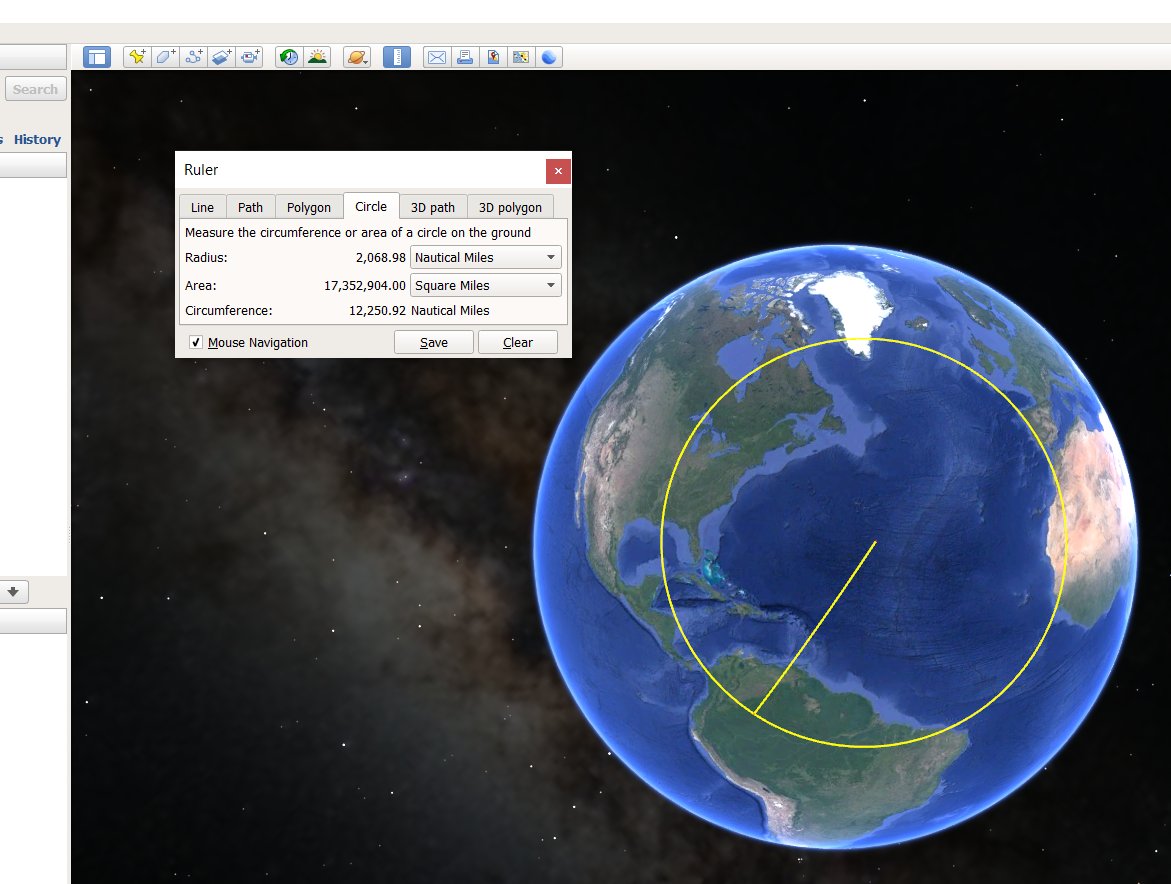
Find those subStar points for Pollux and Capella. For your circles, you need a radius equal to the zenith distance of each star, of course. If you get the ZD in decimal degrees, be sure to multiply by 60 to convert to nautical miles. Next in Google Earth, click on the "Ruler" tool in the top toolbar (see attached image). This is normally used for measuring a simple, direct distance, but it also draws range circles, and that's what we want. Go to the subStar point, but in a wide view where you can see most of the globe. Click at the subStar point... move outward... then click again when the radius is within a few miles of your ZD in nautical miles. And there you have it! A nice circle of position for your sight. Hit "Save" in that Ruler tool. Then repeat for the other star. You are where the circles cross.
That's too easy. It's also misleading. This process is almost exactly what we need for a two-star celestial fix. But the circles created by this Ruler tool are composed of two few points. If you select "Properties" on a saved circle generated by this process, you can see the individual points. So the crossing point for the circles isn't actually an accurate fix. There are ways of generating better circles of position, but let's look at another approach...
The method above using "Google Earth" is too much work for many people, and also it requires the stand-alone desktop app version of Google Earth, known from its early days as "Google Earth Pro". The web version of Google Earth is much less useful, but unfortunately it looks likely that --following Google's long-standing policy of abandoning useful products-- the web version will soon be the only version.
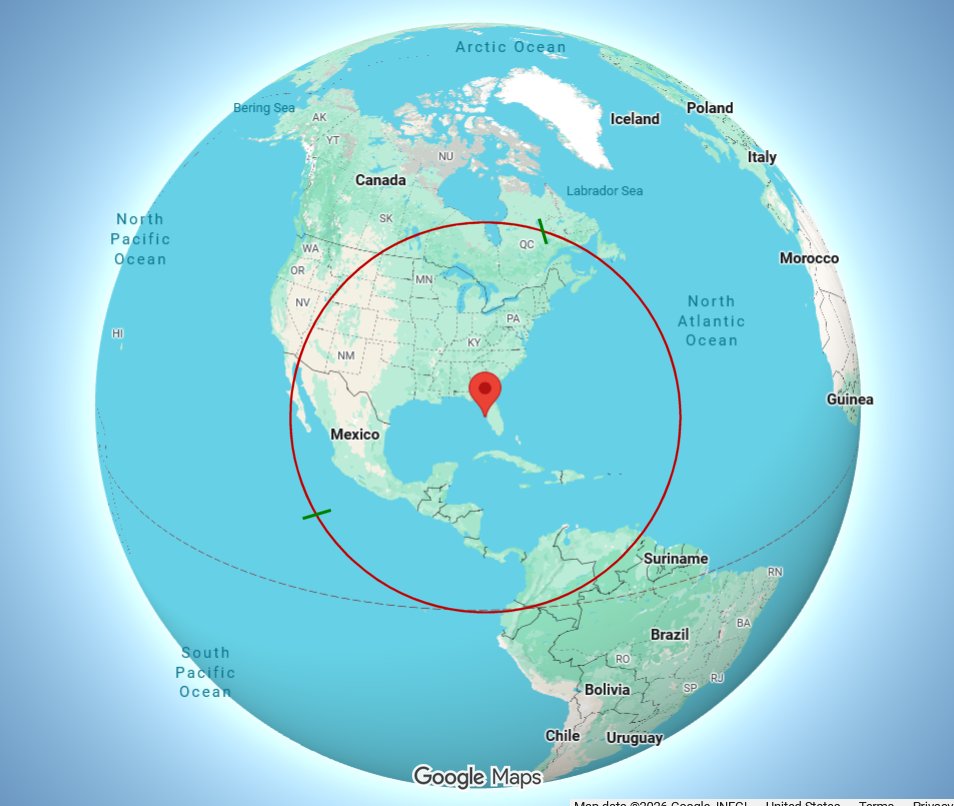
We can do something similar in Google Maps though we do need to apply one feature. You need to turn on "globe view". This does not mean satellite view, or a view that resembles the Earth from space. Globe view simply bypasses the stupid Mercator view and displays the globe "like a globe". Instead of using a built-in tool to draw circles on this globe, we will do that "manually". But we need to make certain of one view setting for each COP we want to draw. Go to the subStar point (search on the lat/lon... e.g. enter 29.5 N, 65.2° W in the map search). This will put a pin on the globe. Now zoom out to a wide view where you can see most of the globe. And then --this is the important trick-- center the pin at the middle of the visible circular outline of the globe on-screen. Now you can copy that as an image, or you can print it, as suits your drawing process. Circles drawn around that central point, the subStar point, are true (small, not great) circles on the globe, and therefore they correspond exactly to celestial circles of position.
How do you get the radius of your circle right?? I'll leave that as open puzzle for now (hint: where is it "noon" on a celestial circle of position, and how does that relate to the radius of the circle...).
Draw one COP on one image (or printed page). Draw the other COP on another image. Then, looking at ground features, determine where they cross. This gives you an excellent fix in principle. Excellent in principle, but not all that accurate... Like any manually "drawn" circles of position, the resolution is too low to read out a good fix. Ah but... we now have a position within a degree of the true fix and now you can treat this as an "AP" for whatever sight reduction process suits you. I'll leave that as an option.
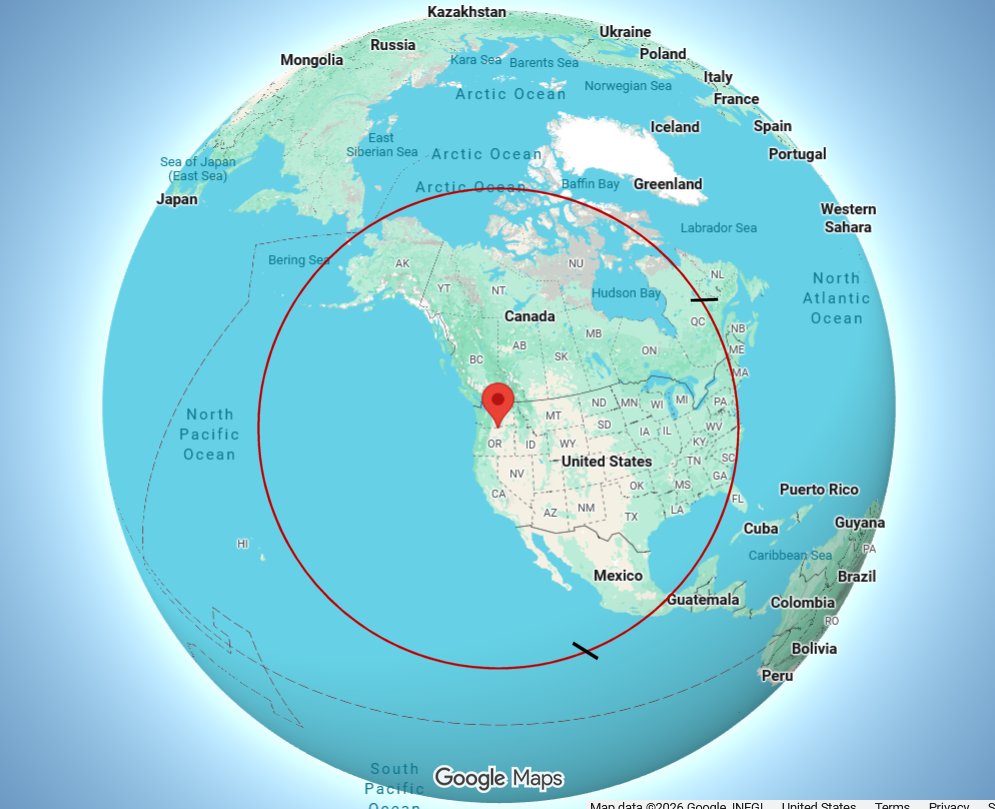
In the attached images, I selected my GHAx so that the subStar point for Pollux landed on the beach west of Tampa, Florida. That placed the subStar point for Capella in southern Washington state just north of the Columbia River. I centered each of those, drew my circles manually, and then figure out the crossings point visually. The northern crossing point is about halfway between the Manicouagan and Caniapiscau Reservoirs in Quebec.
Frank Reed