NavList:
A Community Devoted to the Preservation and Practice of Celestial Navigation and Other Methods of Traditional Wayfinding
From: Brad Morris
Date: 2014 Mar 19, 15:12 -0700
Gentlemen
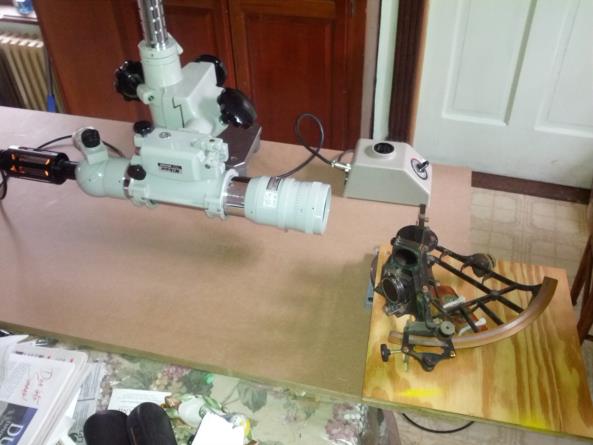
I have created a wooden mockup of the expected granite and metal sextant arc calibration mechanism. This is to provide us with the same service that was formerly provided by the Kew Observatory and/or the National Physical Laboratory. They provided certificates, which we often find in the sextant box.
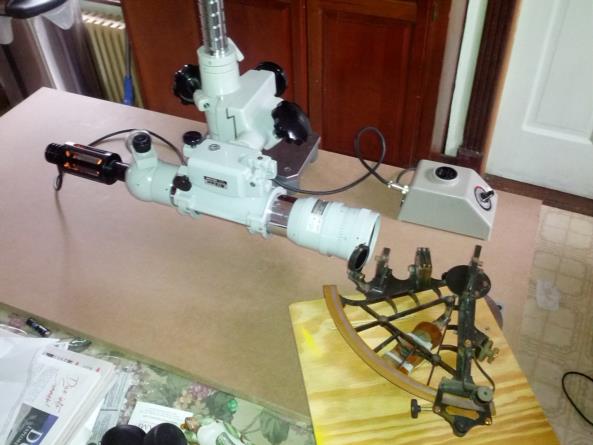
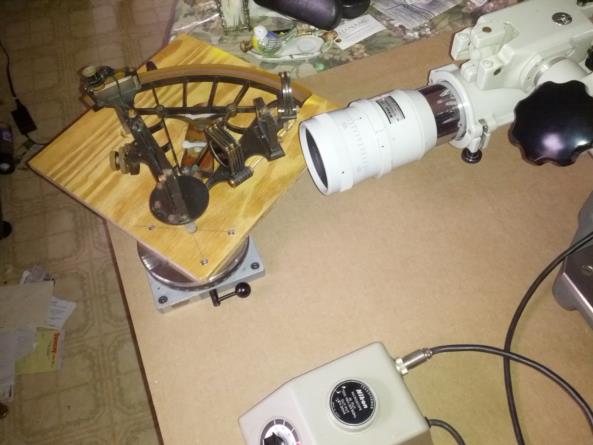
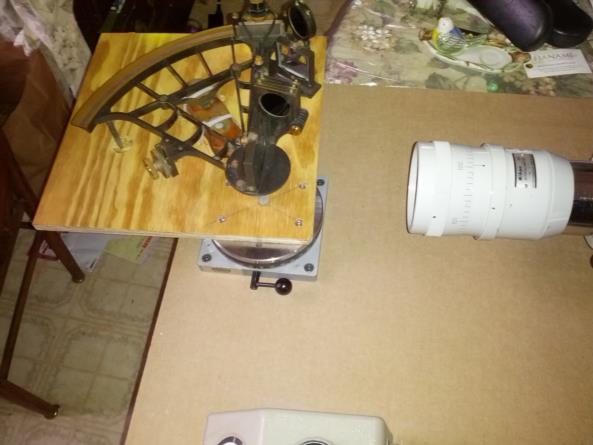
There are two critical pieces of kit. The first is a Nikon 6D Dark Field Autocollimator. That is the silver tube and stand. New, that's a $30K instrument. It provides direct readings to 1/2 arc second, interpolated visually to 1/4 arc second. The other is an Ultradex, visible under the sextant's index mirror. New, that's a $10K instrument. Accurate to 1/5 arc second, any position to any other position, repeatable to 1/20 arc second. This makes my error budget on the order of .3 arc seconds.
Naturally, I'll replace the wooden plate holding the sextant with an aluminum plate. The wooden plate supporting the entire structure will become granite. I like to make mockups to eliminate costly mistakes when it comes to committing to metal. What you see is the third revision of the device.
If you look at the sextant mounted in the device, you will see it at 0° and at 120°, yet the index mirror is always relatively orthagonal to the optical axis of the autocollimator. As the sextant rotates in one direction, the Ultradex rotates in the other. The arc displaced should be one to one, but in practice, there are deviations. Those are measured by the autocollimator. Since the Ultradex is so deadly accurate, the errors can be attributed primarily to (1) the arc or eccentricity error (2) the ability of me to set the vernier in to exactly the same place and (3) in the case of this flimsy mockup, everything bending and moving under static loads.
I measured at every 20 degrees of sextant arc going up from 0 to 120 and then back down from 120 to 0. This is performed 3 times. For each point, the sextant was set using only the direction of up or down. That is, if going up, it was set only from the low side going up. If going down, it was set from the high side going down. A total of 42 measurements were taken, 6 at each of the 7 sextant locations (0, 20, 40, 60, 80, 100 and 120°)
The accuracy is simply the average of all 6 measurements for each location. Since it is arbitrary where the autocollimator is zero'd, the accuracy presented herein is a normalized figure of merit.
As a comparison, the 1921 National Physical Laboratory certificate that accompanied my Heath Hezzanith Sextant (serial U487) states that this sextant has a zero-zero arc calibration. My measurement agrees in principle and is the reason this first light is released! We are about to regain the certification process which was lost in the mists of time! I'd like to call it the "Physical Q" (a combination of Kew observatory and the national Physical laboratory)
I intend now to proceed to the second phase, in which the members are granite and steel. The entire device will be moved onto a concrete slab. The flimsy, deflecting, bending mess will become stiff.
I would love to hear your comments and concerns. I'd love to discuss the newly created device and the process. I'm so excited, I can barely type this!
Secondly, if any readers would like a sextant arc calibration performed, I'd like to hear about that that too. A simple "could you measure mine?" will do. I'm attempting to gauge the market. Does it exist? Is there any interest in arc calibration?
Brad
----------------------------------------------------------------
NavList message boards and member settings: www.fer3.com/NavList
Members may optionally receive posts by email.
To cancel email delivery, send a message to NoMail[at]fer3.com
----------------------------------------------------------------
